555 One-Shot Timer Project
I suppose that if you set out to build a Blaster Pistol, you should expect that somewhere along the way you might be required to construct a Uranium PU-36 Space Modulator, but I wasn’t prepared to build a Oneshot Monostable Multivibrator.
When I first thought about adding light and sound to my raygun project, I really just envisioned using the gun’s trigger as a switch to turn on the sound and light effects – done. But I quickly realized that the effects would need to pulse in a consistent and controlled manner. With each trigger pull, you should get a pulse of light, and a blast sound. To seem convincing, the duration of the pulse should be the same each time and only happen once when you pull the trigger even if you were to keep the trigger switch closed. And you don’t want the sound effect looping over and over or getting cut short.
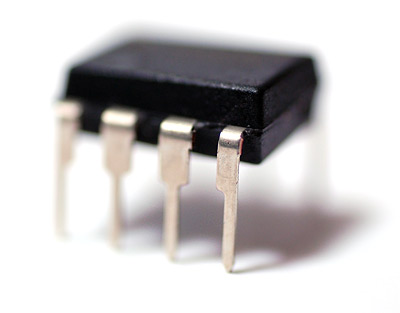
The 555 Timer IC
When I surveyed my expert sources for advice about how to better control my effects, the resounding answer was “use a 555 timer”.I have built a lot of electronic kits in my day, but for some reason every time I try to tinker with building my own circuits from scratch, I fail miserably. I have tried a number of times to teach myself the fundamentals of electronics by getting some components and building a small amplifier or some such project, but it never seems to work out. This time I was determined to make it work, so I researched 555 timer circuits, bought a few of the IC’s and gave it another try. But before getting into it, I went to Ebay and bought a huge lot of resistors, capacitors, a breadboard, jumpers, and other components that someone else had cast off, probably after becoming frustrated with learning electronics. I remembered from my previous forays that one of the most frustrating things about experimenting was not having the right resistor or capacitor on hand and having to run to radio shack and pay $10.00 for .30 cents worth of parts and still not get what you need.
Even with great determination and much time devoted to the project, it was still sort of frustrating. You see, the 555 has been in use since the early 1970’s and seems to have been the mainstay IC of homebrew electronics experimenters until PICs became ubiquitous. There are literally thousands of circuits out there that are built around the 555, and I found 5 or 6 that looked to be just what I needed. However, the first three designs that I tried all failed to work as advertised (if they did anything at all). I was remember why I had given up on circuit craft those other times.
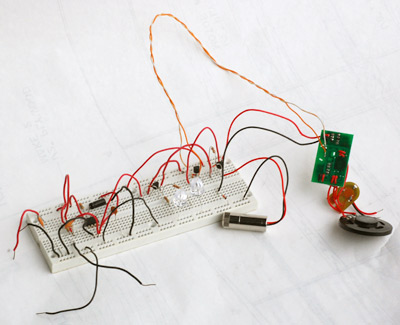
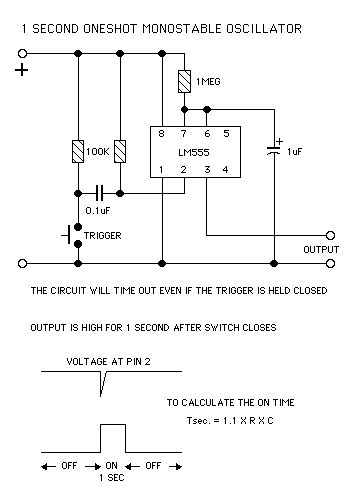
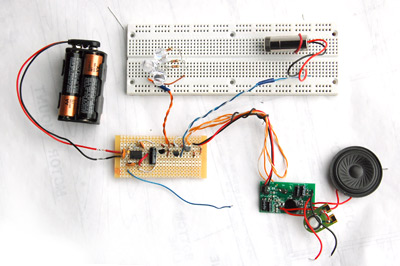
Finally, over on Rob Paisley’s site I found a circuit that looked a little different than the standard 555 one-shot.
This one actually worked.
Once I had the timer pulsing an LED on the breadboard, I started adding the actual effects that I wanted to use in my project. I want the firing sequence to do 3 things:
1) Pulse a cluster of super bright red LEDs with a forward blast of light.
2) Shoot out a blast of red laser light that with project a nice red spot all the way across a well-lit room.
3) Make a nice laser gun sound that is synchronized with the lights.
I bought a little laser diode assembly on ebay that came with a focusable collimating lens, which allows you to spread the usual pinpoint laser dot out into a bigger red blob.
For the sound effect, I bought a Radio Shack recordable sound module. To get the sound onto the module, I cut of the microphone and clipped the leads to an RCA-to-mini stereo cable and plugged that into the headphone jack of my computer. By pushing the record button on the module and the play button on the computer at the same time I was able to load up a laser sound that I found somewhere on the web.
Adding Transistors
When I added the laser to the circuit, things stared going haywire. I guessed that the laser, LED, and sound board circuits would need to be isolated from each other, so I used the signal from the 555 to trigger an NPN transistor to switch on the LEDs. Then I ran a jumper from the emitter of the LED transistor to trigger the another transistor to turn on the laser.Things were better but still erratic, so I added diodes to the transistor base connections, which fixed the problems. I removed the play button from the sound module and soldered on some wires in its place. I used a third transistor to trigger the sound board. I also had to add diodes to the sound board power leads, or it would cause the laser to put out only a faint glow. It’s all very mysterious.
Building The Circuit
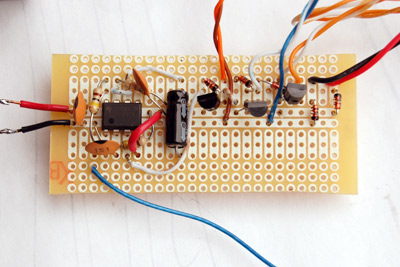
Once I had all the bugs worked out, I dismantled the breadboard version and rebuilt the circuit on a piece of perforated circuit board. Even though I used the exact same components that I had used in the breadboard setup, it didn’t work quite right when I built it on the circuit board. I had to change the timing resistor to get the correct timer pulse, and use a different current limiting resistor to make the laser come on. Lots of trial and error, but I have a great sense of accomplishment for getting further than I have in my previous attempts at homebrew electronics.


0 komentar:
Posting Komentar